Sunday, March 2, 2014

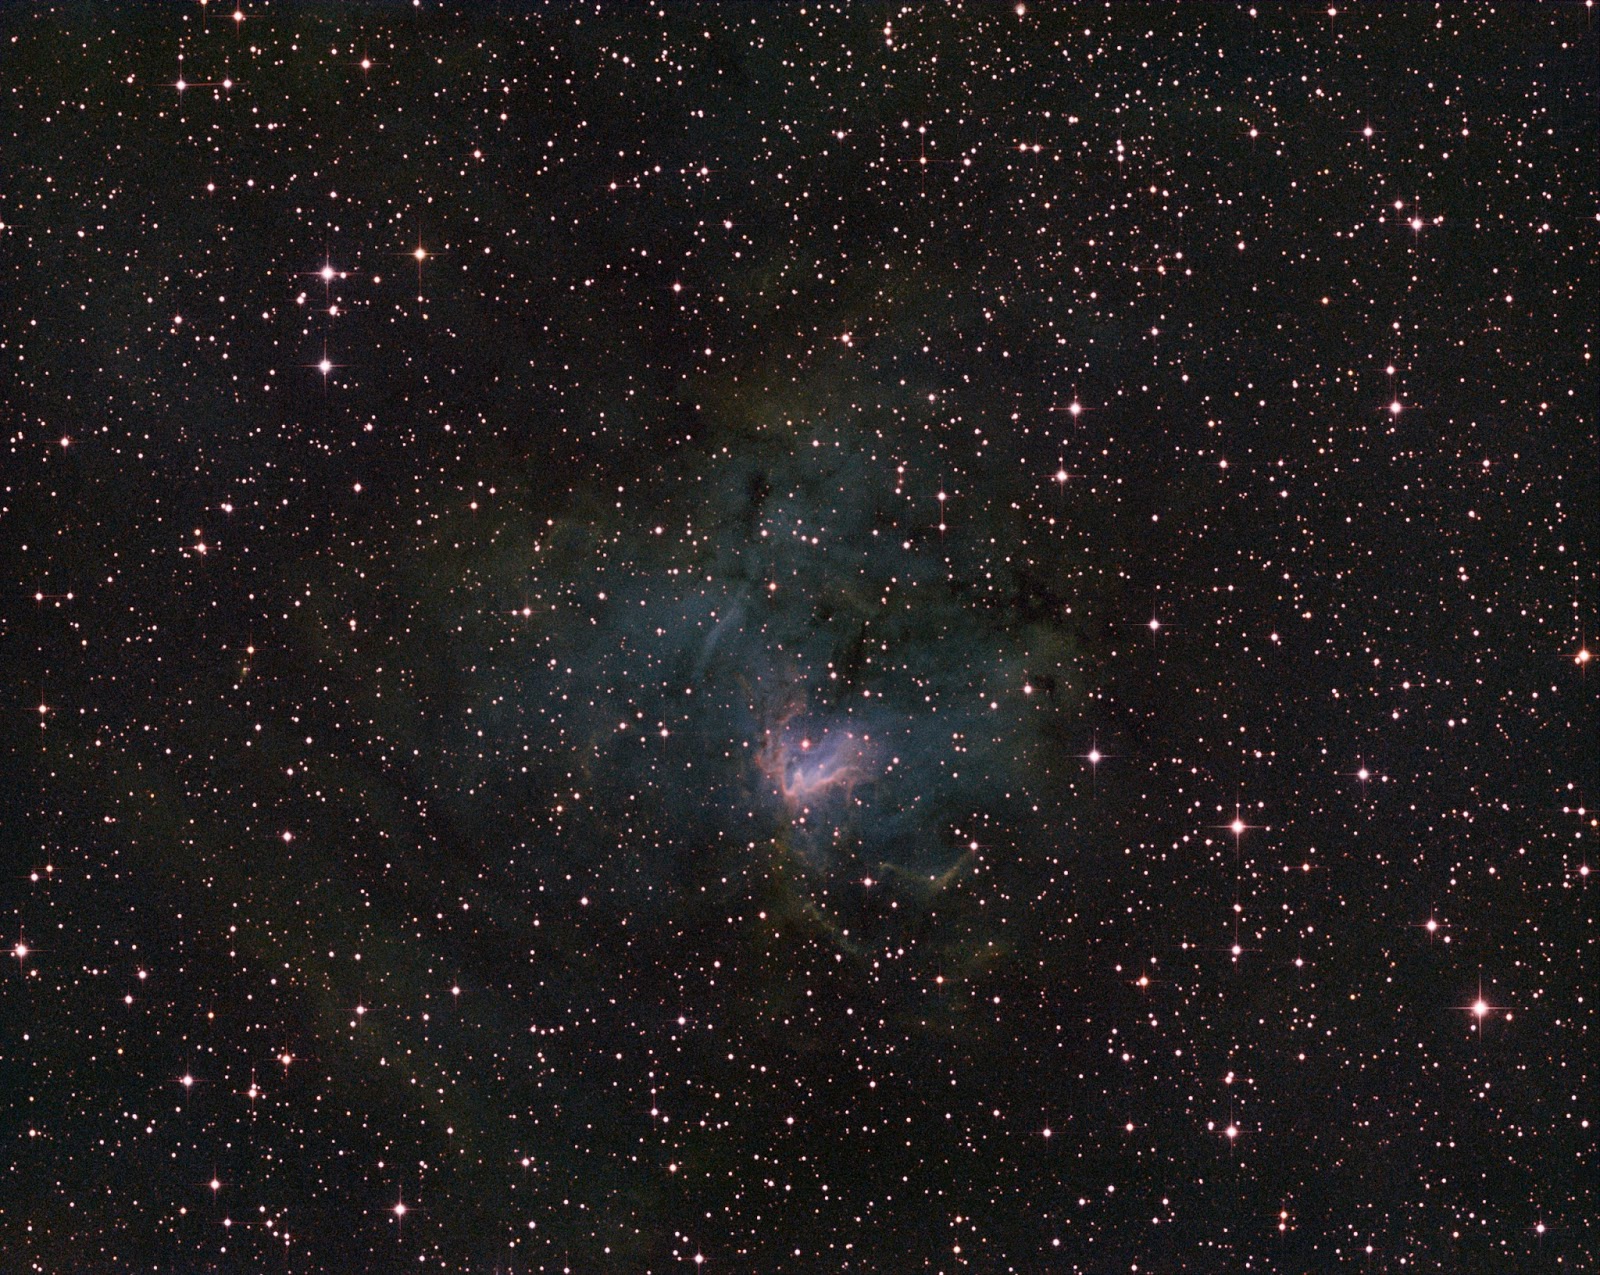
NGC 1491

NGC 1491 is an emission nebula in Perseus. It's 10,700 light years away in the Perseus arm of the Milky Way. Stars are created in this nebula - and the ultraviolet light from those newborn stars excite the atoms of the nebula - which makes it glow.
Click on the image for more details on capturing this image.

I did not have enough time to capture more SII (red) data. But with a lot of processing (see below), I could bring out quite some detail. Here is the core part of the nebula:

Some nice detail, but it shows that this image could use more data to increase the SNR.

Because this object turned out to be rather faint, I really had to stretch my post processing skills on this one:
  1. I calibrated, stacked and aligned the images in CCDStack and cropped them.
  2. Then I neutralized the background of all 3 images
  3. I combined them by summing them up for a synthetic luminance image
  4. Deconvolved this image
  5. Stored all of them (scaled) as TIFF's
  6. Then, I used Straton to create a star-only image of the synthetic luminance image.
  7. Loaded the SII, Ha and OIII images in Photoshop and used a tutorial by Paul Kanevsky for DDP (Digital Development Processing) in Photoshop (unfortunately, the action that Paul made out of his tutorial does not work in Photoshop CS6)
  8. In Photoshop, I combined the SII, Ha, OIII images as described by Ken Crawford.
  9. Of each individual image, I "brought out the faint stuff" using a great recipe by Scott Rosen.
  10. Then I adjusted the levels of each individual image to darken the background
  11. Adjusted opacity of each layer to get a good mix of all colors (as always the green from Ha was dominant)
  12. Added a CAB layer and applied GradientXTerminator
  13. Used a "Selective Color" layer to reduce the amount of magenta (mostly in the stars) and to bring out the orange parts more
  14. Loaded the synthetic luminance image
  15. Used an adjustment layer with a mask to reduce the brightness of the core and increased its contrast (see e.g. http://helpx.adobe.com/photoshop/using/masking-layers.html for an explanation)
  16. Layered the luminance image over the combined image using "Soft Light" mode and adjusted Opacity to find a balance between bringing out details and still showing the fainter parts of the nebula
  17. Loaded the star-only image and used a simple levels adjustment to remove all nebula remnants (but being careful not as to remove any faint stars)
  18. Layered this star-only image on top (using Screen mode)
  19. Finally, I created a CAB layer on top and applied the "Star Diffraction Spikes Fat Stars" from Carboni's Astronomy Tools.
There are so many steps here that I tried for real for the first time. Considering that, I'm pretty happy with the result.

Friday, February 28, 2014

The Medusa Nebula

The Medusa Nebula (or Abell 21) is a planetary nebula in a distance of 1,500 lightyears in the constellation Gemini. It was discovered fairly recently (1955) and it was first thought to be a supernova remnant. It has its name from the braided serpentine filaments of glowing gas which look like the serpent hair of the Medusa (from the Greek Mythology).
(click on image for acquisition detail)

I had to use GradientXTerminator to remove some gradients in the Ha, SII and OIII images. I used a star mask to whiten the stars and Carboni's astronomy tools to add some fraction spikes.

Saturday, February 22, 2014

Making stars white in narrowband images

Stars always have this intense magenta color in narrowband images. One way is to tone down magenta in the image, but that also affects the other objects and might destroy faint nebulosity.

A few months ago, somebody talked on a mailing list of Straton - a tool to remove stars from an image. Or reversely extract the stars from an image.

Let's try this out on a recent image that took (color combined, basic stretches and level adjustments and sharpened):

For processing this image, I already have a synthetic luminance image (combination of the Ha, OIII and SII image):

I loaded this in Straton and removed the stars from it and then subtracted this from the luminance image:

But looking into the lower part of the image shows that there is some nebulosity left:

After loading the file into photoshop, I adjusted the levels to carefully remove these fainter parts (careful, so that I don't remove faint stars). Here is the same part as above:

And finally, I layered this on top of the original image:

Comparing this with the original image above shows that the stars are white, but the nebula itself looks exactly the same. But there are still pretty strong magenta halos left. In SII (red), the stars are larger then in OIII (blue) and those are larger then in Ha (green).

From Carboni's Astronomy tools, I used the "Make Stars Smaller" action before overlaying the white star mask:

Although, now the nebula lost some contrast ...

Monday, February 17, 2014

Showing the PHD graph in SGPro

SGPro has a useful feature where it shows the PHD guiding graph. That way, I don't have to switch between the two. But ever since the update to PHD2, the graph didn't update anymore.

Somebody asked on the mainsequencesoftware mailing list about this. The recommendation was to remove all existing log files as SGPro might pick up the wrong one. I did that, but now SGPro showed an error message: 

"No PHD Log is available. Is logging enabled in PHD?"

I asked on the same thread about this and the fix is to use Documents\PHD2 as the log folder. I did that, and now the graph shows up again. One thing that was left was that PHD2 expected the darks still in the Documents\PHD folder. But after copying the darks to the Documents\PHD2 folder and loading them once from there, PHD now remembers and uses this path. Problem solved!

Saturday, February 8, 2014

Elbrus for plate solving

Using a local astrometry.net server for plate solving is great as it doesn't require me to have an active internet connection (important for star parties)! But astrometry.net always does a blind solve, i.e. it can take many seconds until an image is plate solved.

After reading a lot about the Elbrus on the SGPro mailing list, I wanted to try it out. The mainsequencesoftware.com hosts its own version of Elbrus with a special installer. Downloaded it, installed it (as administrator), set Elbrus as my plate solver in SGPro and entered resolution (arcsec / pixel) and location.

Tried it with an image of Thor's helmet that I took recently: came back in less then 1 sec!!! Then I tried it with an image of M82: same speed. The good thing is that SGPro automatically uses astrometry.net as a blind solver. I invoked it on the same image and it took 11 seconds.

Finally, I tried it with an image of the Rosette Nebula that I took. Here the resolution is quite different - still it could solve it in less then 1 sec.

I also updated ansvr to 0.9 and installed a startup shortcut for it, so that it gets started automatically.

Very cool! Can't wait to try it out next time!

---

Just tried it out: a simple center from 0 degree declination to NGC1491 (declination 51 degrees). This consists of taking an image, plate solving, slewing, taking an image, plate solving, correction slew, taking an image and plate solving.
Using Elbrus: 1:04 minutes
Using astrometry.net: 1:42 minutes

Thursday, February 6, 2014

SN2014J

I finally got around to take an image of M82 with its supernova SN2014J. Taking images of galaxies (especially small ones like M82) from my backyard is still a major challenge to me. The light pollution and all the gradients make it really hard to create a good image.

It's fascinating that this one single star outshines the entire galaxy!

This image consists of 80x30sec Luminance and 90x20sec RGB (each) subimages.

Startup routine

After many iterations and tries, I have my startup routine finally down to a few minutes:
  1. Polar Alignment with the RAPAS (2 mins)
  2. Start TheSkyX, slew to a point near the meridian and 0 degree declination (on the west side, so that I don't have to worry about meridian flips) (2 mins)
  3. While the scope is slewing, start SGPro, connect everything, open flip-flat
  4. Run focus routine (2 mins)
  5. While focus routine is running start PHD2, connect mount and guider
  6. When focus routine is done, run PHD2 calibration (2 mins)
  7. While PHD2 calibration is running, load or create SGPro sequence
  8. Start imagine
Overall, I start imaging in less then 10 minutes!