Thursday, November 24, 2016

Bubble Nebula and around

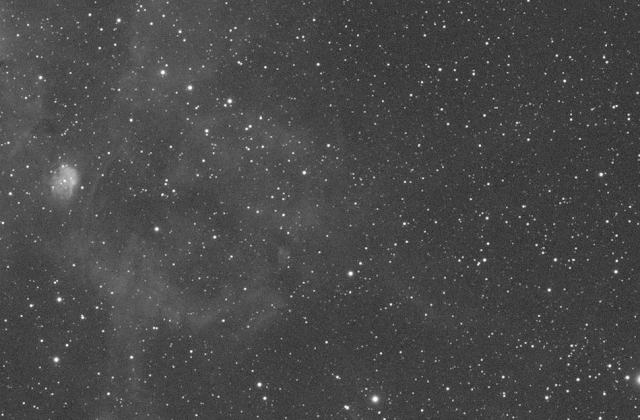
I took a narrowband image of the Bubble Nebula and surroundings (a two image mosaic):

(click on image for full resolution)
Because of the image scale, there is a lot of detail here:
     
Bubble NebulaNGC 7510 - an open star cluster

     
Outer arm of Sharpless-157Core of Sharpless-157

NGC 7538
Apart from the long exposure time (23+ hours), it took me a long time to process this image:

But it was worth the effort!

... and finally I had to figure out how to upload this large image to Blogger ...

Wednesday, November 23, 2016

Uploading a large mosaic to Blogger

When I tried to upload the jpg from my latest mosaic to Blogger I always got an error message (image too large). I reduced the images size more and more until it was a few K (and a horrible resolution). But still the same error.

And then it dawned on me: maybe it's not the image size, but the image dimensions! I reduce the image dimensions by 50%, created a JPG (5.2M) ... and could upload it with no issues!!!

A more specific error message in Blogger ("image too large") would have been helpful here ...

Tuesday, November 22, 2016

Fixing slight cosmetic issues with Photoshops Layer Masks - instead of creating a mask in Pixinsight

As always, I tried to remove the magenta from my latest narrowband images. And while it worked well on all the stars it also left some cosmetic issues in some bright areas of the image:

I tried a couple of adjustments

  • adjusted the formula to adjust green - but either the stars stayed magenta, or I created these artifacts again
  • used an inverted star mask to protect everything but the stars - but because the magenta color is mostly in the fainter outer halos of the stars, it didn't work
  • used a range mask that just selected the areas where these issues occurred - but I could adjust the mask fine enough
I ended up fixing it with a completely different idea from how we blended the milky way images:
  1. I stored the image before running Pixelmath to remove the magenta and after.
  2. I open both images in Photoshop as layers with the processed image on top
  3. I create a "Reveal All" layer mask on the top layer
  4. Carefully drawing with black brush over the areas with the cosmetic issues - thus revealing the unprocessed image underneath
And now I could load it again in Pixinsight for final processing.

From Pixinsight to Photoshop - and back

In the past I tried a couple of times to save an image in Pixinsight and process it in Photoshop. I figured that the best format would be TIFF. But every time I tried it, the image opened up in black and white or with very distorted color.
Turns out I have to chose "16-bit unsigned integer"!


Yei!!!

Thursday, November 10, 2016

*** Error: Current image height differs from first image height. - When using GradientMergeMosaic

For my bubble nebula images, I followed again the tutorial from LightVortexAstronomy for creating mosaics. It worked all well until I wanted to merge the first two images and received the following error:

*** Error: Current image height differs from first image height.
<* failed *>

And upon closer inspection of my two Ha images, it turns out that one has a dimension of 9561x11410 and the other of 9561x11409 (i.e. one row less then the first one). I read about it and it turns out that this can happen when StarAlignment tries to align my images with the rough mosaic and through corrections, the resulting image "sticks" a little out. When looking at my rough mosaic:

You can see that the image on the lower bound and lower left and upper right comes right to the end. I.e. it's easy that individual pixels can be moved over resulting in two images that don't have the same dimensions.
Some people recommend to fixing it by just use the Resample process to adjust the dimensions of one image to the other. I didn't like the idea to needlessly shift the image by a column/row and loose some accuracy in the data.
After trying various ideas, I realized that I can fix this by just making the rough mosaic image a little larger:
Extended image (using DynamicCrop)
This is easy using the DynamicCrop process and dragging the borders outwards.

Now, when aligning the rough mosaic with the individual images, the dimensions are the same - plus some black borders around the image:


But the dimensions are the same! And now I can use GradientMosaicMerge to merge them together to one larger image:

And then I can crop all the dark borders out. Voila!

Saturday, November 5, 2016

Comparing various Pixinsight preprocessing processes

So far, I used the Preprocessing script in Pixinsight with the default values (except for using different pixel rejection algorithms depending on the number of subs). Kayron Mercieca has on his Lightvortexastronomy blog a tutorial using custom weights, preprocessing, ImageIntegration with Sigma High and Low parameter optimization and DrizzleIntegration for this. This will take MUCH longer to preprocess my images, so I wanted to try out what the different modes do:
  1. Preprocess Script with default values
  2. Preprocess Script for calibrating and registering and ImageIntegration with Sigma High and Low parameter optimization
  3. Custom Weights (using the Subframe selector script) plus everything in #2
  4. Everything in #3 plus DrizzleIntegration
I then used the SubframeSelector script in Pixinsight to measure these images:

FWHM (pixel)SNRWeight
#1
1.766
3.427
#2
1.770
3.692
#3
1.754
3.710
#4
3.693
6.927

The FWHM increase in #4 is surprising. But remember that drizzling upsamples the entire image by 2. So, for a better comparison, I downsampled #4 by 2:

FWHM (pixel)SNRWeight
#4 - downsampled
2.016
7.249

The degradation in FHWM is unfortunate - but the increase in SNR is amazing!!!

---

Vicent recommended to try Gaussian drops for DrizzleIntegration. He saw in my sample images a significant drop in FWHM. With that, I get:

FWHM (pixel)SNRWeight
#4 - downsampled
Gaussian drop
1.953
5.674

First observation was: Drizzling with Gaussian samples is MUCH slower (several times slower then with square drops).

So, FWHM is significantly down. But so is the SNR. Vicent recommended to set the "Drop Shrink" parameter to 1 if I use Gaussian drops. With that, I get:

FWHM (pixel)SNRWeight
#4 - downsampled
Gaussian drop - Drop Shrink=1
1.963
5.674

I.e. no improvement in SNR but a slight degredation in FWHM. My main challenge when imaging from our backyard is the noise from the light pollution. So, I think I stick with square drops. 

This is also visible in the (stretched) images:
DrizzleIntegration with Square drops

DrizzleIntegration with Gaussian drops
There is much more detail when using Square drops. So, I'll go with that one (for now).

Thursday, November 3, 2016

Hot pixels in DrizzleIntegration

I wanted to use DrizzleIntegration in Pixinsight. I read a lot about it and how it improves the stacked images.

I processed my latest images of the Bubble Nebula and surrounding as I always do plus created Drizzle files. The ImageIntegrated image looks good. But the DrizzleIntegrated image shows some hot pixels:

I tried a number of things:

  • lower the "Linear Fit High" value
  • play with the "Drop Shrink" value in DrizzleIntegration
  • <several other things that I can't remember>
always with the same outcome: left over hot pixels!

I left a message on the Pixinsight Forum asking for help. And received A LOT of feedback and help from Vicent Peris - he seemed to know a lot about this. We tried a lot of things (and I learnt A LOT) but always with the same outcome. Vicent finally tried my data and for him it worked!!! The main difference was that he used an older version of the ImageIntegration process. Apparently the latest version had a problem with rotated images (and some of my frames did of course rotate during registration).

...

Yesterday the new ImageIntegration process came out ... and it is fixed!!! No more hot pixels!!! So, now I can actually go back to processing my Bubble Nebula images.