This post should really have been a series of posts to describe all the avenues I went - but I compress it into one ...
Let me start with what steps finally worked:
- Good (not perfect) collimation with Mire de Collimation
- Perfect collimation and very good alignment with Hotech Laser Collimator
- Final alignment with CCDInspector
1. Good (not perfect) collimation with Mire de Collimation
I was very much surprised how a simple tool like this can be so helpful. I used it together with TheSkyX and overlayed it on the image view. I used the continuous imaging and tried to size the rings in Mire de Collimation such that one ring was just inside the out-of-focus donut:

One problem was that I couldn't reach the collimation screws because the Atlas focuser was in the way:

The solution was to turn the Atlas focuser around, so that it extends from the scope when I move it out of focus.
I had the best luck with bright (not THE brightest) stars. This gave a good donut but allowed me to use short exposure times (1 seconds) which made it easier to see the effect of collimation adjustments.
My workflow was:
- center out-of-focus star
- overlay Mire de Collimation perfectly concentric
- adjust one(!) collimation screw
- re-center out-of-focus-star
- <go back to #2>
Once I figured out the workflow it took just a few nights to get the collimation of the primary mirror.
Once the collimation looked good, I moved onto the front plate. My front plate was initially WAY too tight. The in-of-focus start showed really bad aberrations. I loosened it and used the same process as above to adjust the plate. Because of limited focus range, I couldn't get the star as good in-of-focus as I could get it out, but it was good enough:

After I changed the plate, I also had to redo the primary mirror collimation. It took me a few iterations to get both good.
- using CCDInspector to collimate main mirror and/or front lens - didn't work well
- using CCDInspector to collimate front lens (ask on forum!!!)
- tried collimation mask - didn't work (plus: front or back?)
- posted in OS forum
- Miere de Collimation - yes, simple and works!!!
2. Perfect collimation and very good alignment with Hotech Laser Collimator
This step took me the longest to figure out (see below all methods that I tried and that didn't work). I could get the collimation good - but not perfect. I ended up forking off the $$$ to buy the Hotech Laser Collimator - and it was SOOO worth the money!
First, I put the laser collimator head on my very sturdy DSLR tripod:

Then I stepped through the process to collimate and align the scope:
- Align the scope with the collimator
- Collimate the primary mirror
- Align the imaging train
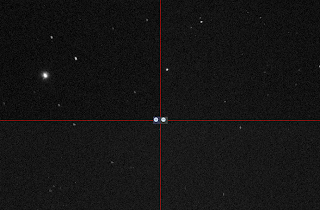
The key in getting great results was #1. I ended up spending 2 nights just doing this. I needed to put on my reading glasses to see very exactly if the three laser dots were in the same position all around:

Again, not difficult to understand but needed a lot of patience and many iterations to get really good.
Then I moved on to collimate the primary mirror. Because it was already well aligned, this didn't take too long, but I could improve it.
 |  |
Excluding setting up and learning about the laser collimator, this took me 3 nights.
3. Final alignment with CCDInspector
Now, I moved the scope outside and did the final alignment using CCDInspector. I used the flatness view to see which corner/side was too far in the front / back (I always had to experiment if I needed to move this corner in or out to correct).
At this point, I made tiny corrections (1/8 of a turn of the alignment screws) - always checking if and how much the plane changed.
Once the plane looked fairly plane, I used the average of first 5 and then 10 images for final adjustments to make sure that didn't end up chasing seeing.
One weird thing happened was that after I had the alignment almost perfect, I moved the scope to the other side of the pier and got this:

On closer analysis, I realized that one of the lock screws wasn't completely fastened. That fixed it. But it also showed how incredible sensitive the scope is to even slight errors.
So, yei! I finally had it. Took me only 3(!!) months ...
Things that I tried that didn't work:
- Using CCDInspector for collimation
I really don't know how this works (I tried both the in-focus and out-of-focus method). I could see with my naked eye that the donut wasn't concentric... Also, for rough collimation the adjustments were so large that I had to refocus A LOT - which made the process really slow. - 4 corner view in TSX
The visualization was good:
But I found it too difficult understanding from the picture what adjustments I had to make - Collimation mask
This only worked for rough adjustment and I found it easier and faster to use Mire de Collimation.

hey, what size chip are using with this scope? Thanks, ioan
ReplyDelete