Friday, September 25, 2015

NGC 7023 - The Iris Nebula

I used the dark skies at GSSP 2015 to image the Iris Nebula - a reflection nebula that is 6 light years in diameter and at a distant of 1,300 light years distance. The nebula was discovered  on 18 October 1794 by William Herschel:
.
(click image for full-size)

This image consists of 5+ hours data (100 min luminance and 75 min red, green blue each).

The blue color comes from the young, hot star in the middle (SAO 19158) - it has 10 times the mass of our sun. Zooming into the center of the nebula shows some reddish glow:

This is the result of ultraviolet light (from the center star) converted to visible light.

I found this great sketch on the web that illustrates how we see this nebula:
Title: Structure and physical properties of the bipolar outflow source NGC 7023
Authors: Watt, G. D., Burton W. B., Choe, S.-U., & Liszt, H. S.
Journal: Astronomy and Astrophysics (ISSN 0004-6361), vol. 163, no. 1-2, July 1986, p. 194-203
Bibliographic Code: 1986A&A... 163.. 194W

Tuesday, September 15, 2015

Sharpless 2-112 - a small emission nebula in Cygnus

Took narrowband images of Sharpless 2-112 from our backyard:
(click on image for higher resolution)

It took me a long time to stretch the red (SII), green (Ha) and blue (OIII) to get some of the details out. This image is 18+hours of data (Ha: 2hours, OIII: 6hours, SII: 10hours).

Sunday, September 13, 2015

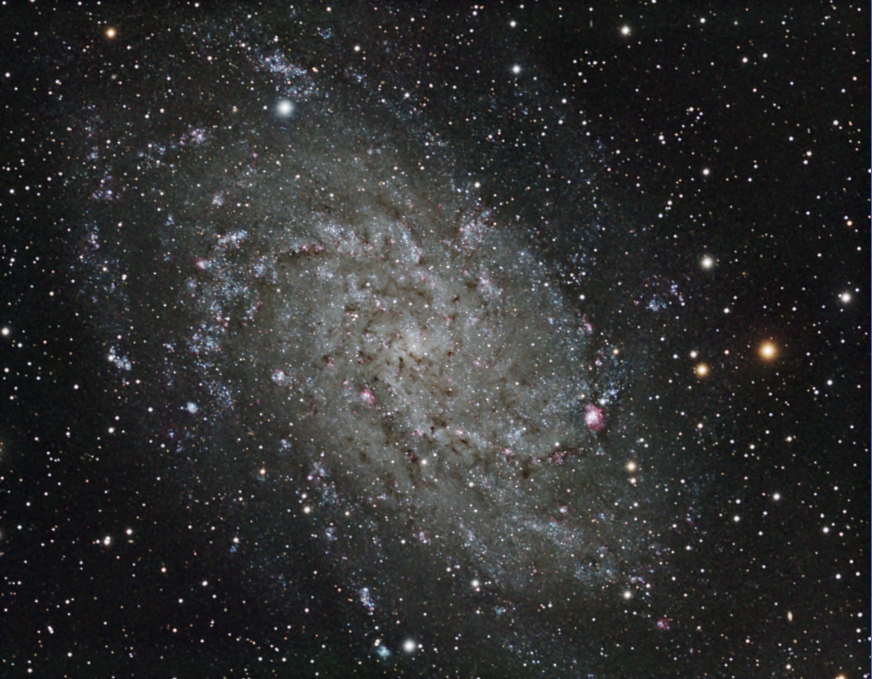
M33 (Triangulum Galaxy) - Now and three years ago

I imaged M33 - the triangulum galaxy. I needed quite a lot of data (15.5) hours, but it turned out surprisingly well:
(click image for full resolution)

As always when imaging from our backyard, I didn't take any Luminance frames but just RGB (all binned 1x1). Framing JUST worked with the small sensor of the MLx694 camera. I chose my new processing steps:
  1. Gradient removal (using DynamicBackgroundExtraction)
  2. Color Correction (using BackgroundNeutralization and ColorCalibration)
  3. Noise Reduction (using MultiscaleLinearTransformation)
  4. Stretching (HistogramTransformation)
  5. Bringing out faint outer details (using LocalHistogramEqualization)
  6. Bringing out details in the core (using LocalHistogramEqualization)
  7. Sharpening (using AtrousWaveletTransform)
  8. Final adjustments (colors, lightness and saturation) using CurvesTransformation
I like the result a lot!

Almost exactly three years ago, I imaged the same galaxy. At that time with my first scope (Celestrono Nexstar 6SE) and my Nikon D7000. This was the image that I took back then (8x4min):

More data, better equipment and more experience seem to pay off :-)

Barnard 143 - My first dark nebula

I tried to image my first dark nebula: Barnard 143. The dark nebula itself doesn't have any details, i.e. the image only consists of stars and dark areas:

These objects are pretty good for our light polluted backyard! This image has a little over 6 hours of data! Processing was very straight forward (gradient removal, color calibration, stretching).

Bringing out OIII and SII details in narrowband images

Most of the time, the Ha signal in emission nebulae is MUCH stronger then the OIII or SII signal. Take my recent image of SH2-112 as an example:

Ha:

OIII:

SII:

All these are stretched and look similar in strength. But combining them results in this:

Increasing the red component brings out more SII details but also leads to a very red background:

To avoid that, I extract the luminance of this image:

Using HistrogramTransformation, I Auto zero shadows and highlights and use this as a mask for this image. The same red stretch now results in:

The sky stays dark and more SII details in the nebula. I don't worry about the magenta stars as I will fix them at the end anyway.

Bringing out inner details in Pixinsight: HDRMultiscaleTransform vs. LocalHistogramEqualization

Recently, HDRMultiscaleTransform was introduced in Pixinsight (well, maybe not so recently, but I recently "discovered" it). I used it successfully a couple of times for images to bring out inner details in galaxies or nebulae. But a couple of times, it was way too strong. E.g. here is an image of M33 that I recently took (after most of the processing):

And here I applied HDRMultiscaleTransform (as "low" as possible):

That's WAY too much. Using a mask and using LocalHistogramEqualization:

I can play with the ContrasLimit setting and then with the Amount setting until I bring out just enough details in the galaxy core.

Noise Reduction in Pixinsight: TGVDenoise vs. MultiscaleLinearTransform

In my last images, I started using TGVDenoise last year. This was based on the easy-of-use but also some analysis about its effectiveness. But I often had the problem that it created blobs on the image that were hard to fix.

Here is an example:

Original:

After TGVDenoise

I tried a lot, but could never get a smooth background. These blobs can be minimized using the ACDNR process after stretching the image, but I found that too cumbersome and didn't want to make too many changes to the image.

Kayron Mercieca recently published a comparison of the different noise reduction processes and their pro's and con's. Based on the great explanations there, I tried to use MultiscaleLinearTransform:

This looks much better - and thanks to the great explanation in the blog post I even understand now how it works and how I need to adjust it.

So, I guess for now, I'll keep using MultiscaleLinearTransform.