For the Milky Way images, I wanted to re-install the TopazDenoise filter (I used them before on a different laptop but didn't install them on this one).
I downloaded them again and installed them. But when I opened up Photoshop, they weren't there. I restarted Photoshop, then all Adobe apps (Lightroom, CC Update...) and finally the laptop. But no luck.
I checked in my filesystem and under C:/Program Files/Adobe/Adobe Photoshop CC 2015/Plug-ins, I found a link to the Topaz plugin.
Then I searched on the Topaz web site and found instructions how to install the plugin manually on Photoshop 2015.5 (copy the plugin to C:/Program Files/Common Files/Adobe/Plug-ins). Tried that, restarted everything - still no luck.
Searched on my disk again and found another Plug-ins folder under C:/Program Files/Adobe/Adobe Photoshop CC 2015.5/Plug-ins. Copied the plugin there. Restarted and: voila!
... who in his right mind came up with the Photoshop version 2015.5 ???!!
Saturday, September 3, 2016

Friday, September 2, 2016
5th Night: Around Crater Lake
Weather conditions did not change much. So, we decided to stay at Crater Lake but now take photos in the surroundings. First, we took sunset images of Mt. Thielsen from the Pumice Desert outside of the Crater (yikes, this will be a pain to clean up those optics!)

Then we went to a nearby, small lake and took Milky Way images from there. The small lake and the trees made a great composition:

And when clouds moved in, I took a short timelapse of the Milky Way behind the clouds (forgetting once again that vertical is a bad movie format!!!)
And then we had to say goodbye!! I can't believe how quickly the week went by and how much I learned, the great people that I met and the awesome photos that I took!!!
Continue on: Should I stay or should I go?

Then we went to a nearby, small lake and took Milky Way images from there. The small lake and the trees made a great composition:

And when clouds moved in, I took a short timelapse of the Milky Way behind the clouds (forgetting once again that vertical is a bad movie format!!!)
And then we had to say goodbye!! I can't believe how quickly the week went by and how much I learned, the great people that I met and the awesome photos that I took!!!
Continue on: Should I stay or should I go?
Thursday, September 1, 2016
Processing Star Trails
We had our second processing session with Dave. This time we focused on Star Trails. Dave also has an excellent YouTube video about this!
- First, load all images into Lightroom
- Pick one image to work on.
- Adjust White Balance
- Increase contrast (to get the star trails out well): move histogram to the right and black point to the right.
- Adjust exposure
- Increase Whites (brighten stars)
- Don't touch blacks - or even lower it to make sky darker.
- Now do the same as for the Milky Way shots.
- Go back to Library view
- Select image, right click, select "Developer Settings" -> "Copy Settings" -> "Select all" -> "Copy"
- Then select all images and click "Sync All" - now all settings from the first image are applied to all other images.
- Now, right click (all images still selected!) and export to JPG (PSD or TIFF would require A LOT of memory as all images have to be loaded at the same time into Photoshop)
- Open Adobe Bridge
- Select all images
- Load in Photoshop as layers
Now, Photoshop opens with all those images as layers (might take a while!)
- Pick a file that has a good foreground (no light pollution, some details...)
- Rename it to "Base Layer" and move to bottom of the stack
- Select all other Layers
- Group them together (name "Star Trails or so)
- Change Blend Mode for all images to "Lighten" (this picks the brightest pixel of each image for the result making all star trails come out - but it also picks up all of the light pollution and plane streaks :-(
- Temporarily move the group down
- Add a layer mask to the "Base Layer" image
- Add a lot of contrast (make foreground black and sky VERY bright) by moving midtones to the left and black point to the right)
- Use Dave's Actions
- Remove this layer and move Star trails back to the top
- Now select a channel where the foreground is white and the rest is black
- Add it as a layer mask to the Star Trails group and paint into it to reveal the foreground from the Base Layer image
- Now cleanup plane trails with the Stamp tool (Dave did it on the entire image, I found it easier to do on each individual image - though it takes A LONG time!)
- Now delete all channels and run Actions again - now we have the real channels for our image
- And now process the image similar to the Milky Way image:
- Pick an area / objects to modify (e.g. make stars brighter)
- Select mask where area / objects are white
- Pick Adjustment
- Make adjustment
- Create Group
- Add Layer Mask and reveal/hide the area
- And at the very end remove noise from the foreground as before.
4th Night: Crater Lake take two
Pretty much all of Washington and Oregon was under clouds - except Crater Lake. So we stayed another night and took images from the west rim. But first, I spend the day driving around the lake, stopping here and there and taking images of the beautiful area.
First, we were treated (again) to a five start sunset (thanks to wildfires!!!) And again: this is just a small selection of all the beautiful images that I took.


Then we stayed there and took Milky Way images. Unfortunately it got very cloudy and VERY windy and cold. We spent most of our time in the cars and only hopped out when the sky cleared up.
I took another Milky Way image:

and a star trail:
I then stayed in that spot and set my alarm clock to 2am to take another sunrise timelapse. But when I got up at 2, I couldn't even see the lake - we were completely fogged in! Out of desperation I set my alarm clock to 4am - and when I woke up the sky was completely clear!!! And it was soooooooooooo cold! Initially I wanted to setup my slider and everything. But I just put my camera on the tripod, connected it to the tablet and intervallometer, started everything and hopped back into the car.
An amazing result!!!!! (though I wished I had let the camera run for a little bit longer until the sun is completely in the crater):
Continue on 5th night: around Crater Lake (or if you are interested: Processing Star Trails)
|
| ||||
|
|


First, we were treated (again) to a five start sunset (thanks to wildfires!!!) And again: this is just a small selection of all the beautiful images that I took.
 |


Then we stayed there and took Milky Way images. Unfortunately it got very cloudy and VERY windy and cold. We spent most of our time in the cars and only hopped out when the sky cleared up.
I took another Milky Way image:

 |
| Startrails over Crater Lake |
An amazing result!!!!! (though I wished I had let the camera run for a little bit longer until the sun is completely in the crater):
Continue on 5th night: around Crater Lake (or if you are interested: Processing Star Trails)
Wednesday, August 31, 2016
3rd Night: Crater Lake
I couldn't wait to get to Crater Lake. But first, I needed a real lunch - before heading south, I stopped in Bend and had meatloaf and bread pudding - ahw, yeah!
And when I finally arrived, I wasn't disappointed: it was beautiful and amazing. We first stopped at the Watchman parking lot and climbed up to the Watchman spot to take images of the sunset. Because of the wildfires, the sunset was nothing short of spectacular. Though it was more beautiful in the valley around crater lake then in the lake itself. Here are just X images - I took so many and it was very difficult to choose.

After that, we moved to a different location on the east rim to take Milky Way shots. With some trees and the lake, there were a lot of options to compose the image. Here are my two best shots:


I also took a Milky Way panorama with our group below (Brian light painted them):

Finally, we moved to a spot on the north rim to sleep (in the cars) where I setup my slider to take a sunrise timelapse of the Milky Way and the lake:
Yes - just before sunset (you can see the first glimpses of light coming into the picture) the batteries of my camera ran out ...
Continue on 4th night: Crater Lake take two
And when I finally arrived, I wasn't disappointed: it was beautiful and amazing. We first stopped at the Watchman parking lot and climbed up to the Watchman spot to take images of the sunset. Because of the wildfires, the sunset was nothing short of spectacular. Though it was more beautiful in the valley around crater lake then in the lake itself. Here are just X images - I took so many and it was very difficult to choose.

After that, we moved to a different location on the east rim to take Milky Way shots. With some trees and the lake, there were a lot of options to compose the image. Here are my two best shots:


I also took a Milky Way panorama with our group below (Brian light painted them):

Finally, we moved to a spot on the north rim to sleep (in the cars) where I setup my slider to take a sunrise timelapse of the Milky Way and the lake:
Yes - just before sunset (you can see the first glimpses of light coming into the picture) the batteries of my camera ran out ...
Continue on 4th night: Crater Lake take two
Tuesday, August 30, 2016
Processing Milky Way shots
In the morning, we gathered for our first processing session with Dave. This was about how to process Milky Way shots. Again, he had a very methodical approach:
1. Main adjustments in Lightroom
1. Main adjustments in Lightroom
- Open up the photo in Lightroom
- Check with exposure slider what data is in the photo (especially in the dark areas - are they really dark or contain some detail?)
- Adjust White Balance - neutral with a slight blue tint
- Tine - only adjust if the image is green or magenta
- Adjust exposure for the sky (very carefull, the sky itself should stay dark)
- Dave doesn't do any sharpening (clarity, dhazing...)
- Adjust Whites (for milky way - don't blow it out!!! - might have to readjust White Balance afterwards)
- Adjust Blacks for foreground (very little - we will get more foreground details later)
- Use Vibrance if necessary
- In Lens Correction only use "Remove Chromatic Aberration" - don't use Profile Correction (this will most likely create elongated stars)
- In Camera Correction, maybe adjust blue saturation a little (could be that stars became too blue from white balance setting)
- Export this to a PSD file
- Now, in the same image, increase the exposure and just pay attention to the foreground - get some detail out (but not too much! It's dark after all!)
- Now, export this to a PDS file too
2. Fine Tune in Photoshop
- Open Adobe Bridge and select both images
- Select Tools -> Photoshop -> Load files into Photoshop layers
- Now, in Photoshop, we have 2 layers, name them "Milky Way" and "Foreground" - move Foreground to the bottom.
- First, we blend both layers using a Layer Mask. Using a White (Reveal All) mask on top of the "Milky Way" picture, we can now paint with a brush on the foreground to get the brighter foreground from the second picture. If there are small foreground details (e.g. trees or branches) it can get tricky to get those in without brightening up the sky)
- Group these two layers together - they are now our base image in Photoshop
- Now do some simple cleanup (e.g. remove plane trails with the Stamp tool)
- Now use Dave's Actions (click on "First, Use Step 1 - click here" and on the play button)
- This creates several channels that can be used to work on different parts of the image (stars, milky way, foreground...)
- Now, we always use the same approach:
- What do we want to work on, e.g. Milky Way
- Select a channel where the Milky Way is bright and the sky is dark (don't worry about other parts of the image!)
- Click on channel, click on "??"
- Go back to the Layers tab and select the adjustment that we want to make (e.g. levels adjustment to brighten the Milky Way)
- This adds a layer with the selected tool and the channel as the mask
- Now, make the adjustments (e.g. increase brightness to make Milky Way brighter) - only focus on the Milky Way and the surrounding sky
- Once we are happy with the result, we first Group these together (Layer Masks only work on Groups)
- Then we select Layer -> Layer Mask and then either a "Reveal All" or "Hide All" mask. The difference is the that first will apply the just selected adjustment to the whole picture and we can selectively blend it out (by brushing with a black brush) from areas that we don't want to. The other one is the revers, the adjustment is not applied and we can reveal it by painting with a white brush.
- Now, apply this adjustment just to the parts of the image that we wanted to apply it to. Make sure that you don't create harsh contrasts (e.g. when brightening the Milky Way, make sure that we don't create steep gradients in the sky around it).
- Repeat this for every adjustment we want to make (e.g. brighten up Foreground, darken sky, adjust color in some parts, bring out just the Milky Way core, bring out the reflection of the Milky Way in the lake...)
- Always make sure not to go overboard and create an unnatural looking image. We want to create an image that reveals details and has colors that we could see (our eyes quickly adjust to different levels of brightness or different lights)
- Once we made all the adjustments, as the final step we want to remove some noise from the foreground. Because we stretched the foreground, it's probably pretty grainy).
- First, we create a layer that assembles all layers from below (Shift-Alt-Ctrl-e)
- Then we apply the noise reduction (e.g. Nik Dnoise or Topaz Denoise)
- Then we select the channel "Noise Reduction"
- And finally we create a new layer - the selected "Noise Reduction" channel is automatically applied as a mask to this layer.
That's it!!! Again, I really like Dave's very methodical approach:
- choose which adjustment we want to make
- select and appropriate channel that will reveal this element
- make the adjustment
- use a Layer Mask to now apply this adjustment only to the part of the image that we wanted to
- lather-rinse-repeat
Finally, we can sharpen the image for different formats (e.g. web, poster...) using TKActions for Web or resize10 from ON1 for printing posters.
Here is an example:
First, in Lightroom
1. Original Image

2. Increasing Exposure

3. Adjusting Whites

4. Adjusting Blacks

5. Increase Vibrance

6. Remove Chromatic Aberration
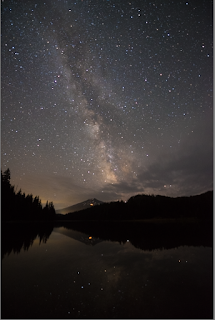
7. Increase Blue Hue

8. Increase Blue Saturation

saved this image for background
9. Increase Exposure
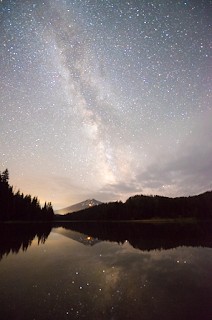
saved this image for foreground
Now, I loaded them in Photoshop:
10. Combine them (foreground and background)
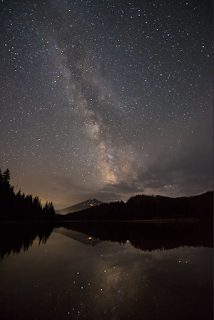
11. Milky Way Brighter

12. Sky Darker

13. Trees Brighter
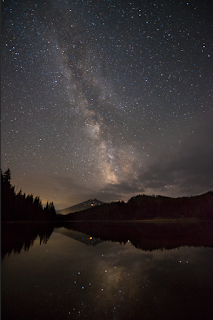
14. Pop Stars

15. Increase Contrast (curves)

16. Decrease Noise in Foreground

Overall:
Continue on 3rd night: Crater Lake
Here is an example:
First, in Lightroom
1. Original Image

2. Increasing Exposure

3. Adjusting Whites

4. Adjusting Blacks

5. Increase Vibrance

6. Remove Chromatic Aberration

7. Increase Blue Hue

8. Increase Blue Saturation

saved this image for background
9. Increase Exposure
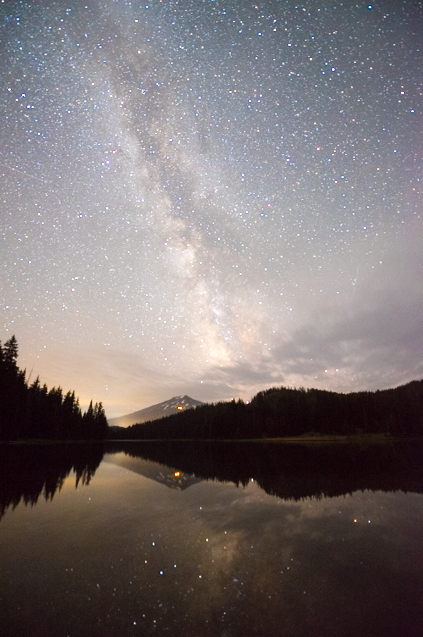
saved this image for foreground
Now, I loaded them in Photoshop:
10. Combine them (foreground and background)

11. Milky Way Brighter
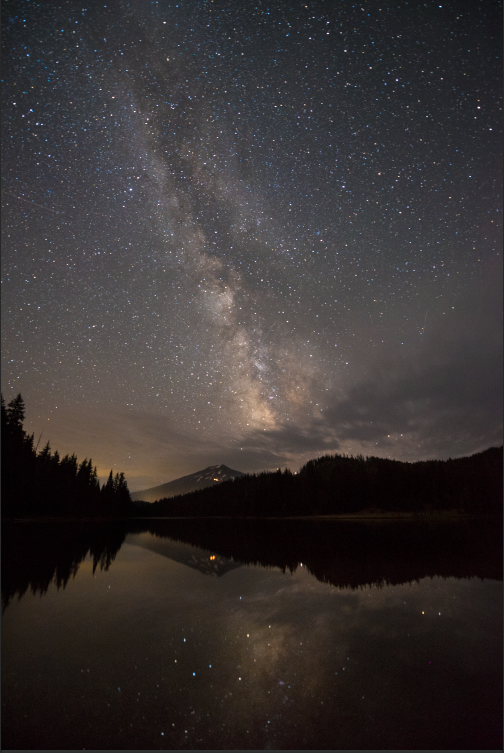
12. Sky Darker

13. Trees Brighter

14. Pop Stars

15. Increase Contrast (curves)
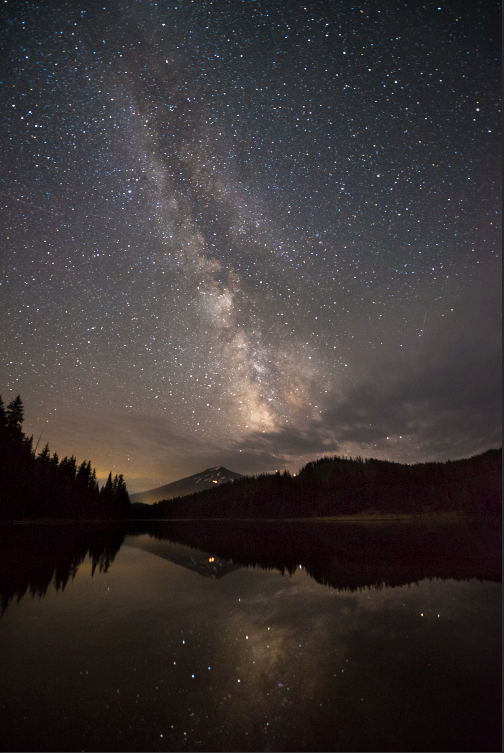
16. Decrease Noise in Foreground

Overall:
 |  |
| Before | After |
2nd Night: Mt. Bachelor
We drove further south to Todd Lake. On my way there, I stopped at the Koosah and Sahalie waterfalls. So beautiful:
At Todd Lake, we setup on the west end of the lake overlooking Mt. Bachelor.
I also took a Milky Way panorama - the weird lights in the front are people from our group with red lights.

Continue on 3rd night: Crater Lake (or if you are interested: Processing Milky Way Shots)
 |  |
| Koosah Falls | Rapids below Koosah Falls |
 |
| Sahalie Falls |
 |
| Beautiful Sunset over Mt. Bachelor |
 |
| Milky Way over Mt. Bachelor - reflected in Todd Lake. If you look closely you can see the Laguna Nebula in the reflection too! |

Continue on 3rd night: Crater Lake (or if you are interested: Processing Milky Way Shots)
Subscribe to:
Posts (Atom)