Wednesday, August 31, 2016

3rd Night: Crater Lake

I couldn't wait to get to Crater Lake. But first, I needed a real lunch - before heading south, I stopped in Bend and had meatloaf and bread pudding - ahw, yeah!
And when I finally arrived, I wasn't disappointed: it was beautiful and amazing. We first stopped at the Watchman parking lot and climbed up to the Watchman spot to take images of the sunset. Because of the wildfires, the sunset was nothing short of spectacular. Though it was more beautiful in the valley around crater lake then in the lake itself. Here are just X images - I took so many and it was very difficult to choose.

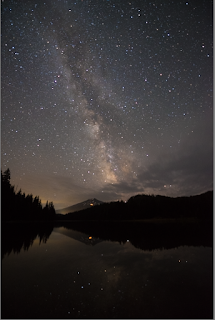
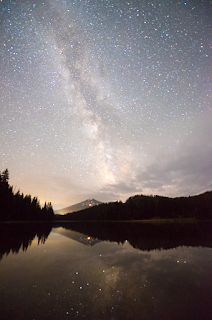
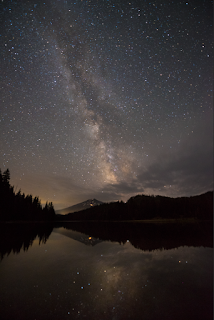
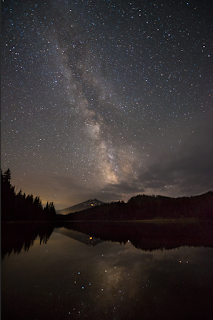
After that, we moved to a different location on the east rim to take Milky Way shots. With some trees and the lake, there were a lot of options to compose the image. Here are my two best shots:


I also took a Milky Way panorama with our group below (Brian light painted them):


Finally, we moved to a spot on the north rim to sleep (in the cars) where I setup my slider to take a sunrise timelapse of the Milky Way and the lake:

Yes - just before sunset (you can see the first glimpses of light coming into the picture) the batteries of my camera ran out ...

Continue on 4th night: Crater Lake take two

Tuesday, August 30, 2016

Processing Milky Way shots

In the morning, we gathered for our first processing session with Dave. This was about how to process Milky Way shots. Again, he had a very methodical approach:

1. Main adjustments in Lightroom

  1. Open up the photo in Lightroom
  2. Check with exposure slider what data is in the photo (especially in the dark areas - are they really dark or contain some detail?)
  3. Adjust White Balance - neutral with a slight blue tint
  4. Tine - only adjust if the image is green or magenta
  5. Adjust exposure for the sky (very carefull, the sky itself should stay dark)
  6. Dave doesn't do any sharpening (clarity, dhazing...)
  7. Adjust Whites (for milky way - don't blow it out!!! - might have to readjust White Balance afterwards)
  8. Adjust Blacks for foreground (very little - we will get more foreground details later)
  9. Use Vibrance if necessary
  10. In Lens Correction only use "Remove Chromatic Aberration" - don't use Profile Correction (this will most likely create elongated stars)
  11. In Camera Correction, maybe adjust blue saturation a little (could be that stars became too blue from white balance setting)
  12. Export this to a PSD file
  13. Now, in the same image, increase the exposure and just pay attention to the foreground - get some detail out (but not too much! It's dark after all!)
  14. Now, export this to a PDS file too
2. Fine Tune in Photoshop
  1. Open Adobe Bridge and select both images
  2. Select Tools -> Photoshop -> Load files into Photoshop layers
  3. Now, in Photoshop, we have 2 layers, name them "Milky Way" and "Foreground" - move Foreground to the bottom.
  4. First, we blend both layers using a Layer Mask. Using a White (Reveal All) mask on top of the "Milky Way" picture, we can now paint with a brush on the foreground to get the brighter foreground from the second picture. If there are small foreground details (e.g. trees or branches) it can get tricky to get those in without brightening up the sky)
  5. Group these two layers together - they are now our base image in Photoshop
  6. Now do some simple cleanup (e.g. remove plane trails with the Stamp tool)
  7. Now use Dave's Actions (click on "First, Use Step 1 - click here" and on the play button)
  8. This creates several channels that can be used to work on different parts of the image (stars, milky way, foreground...)
  9. Now, we always use the same approach:
    1. What do we want to work on, e.g. Milky Way
    2. Select a channel where the Milky Way is bright and the sky is dark (don't worry about other parts of the image!)
    3. Click on channel, click on "??"
    4. Go back to the Layers tab and select the adjustment that we want to make (e.g. levels adjustment to brighten the Milky Way)
    5. This adds a layer with the selected tool and the channel as the mask
    6. Now, make the adjustments (e.g. increase brightness to make Milky Way brighter) - only focus on the Milky Way and the surrounding sky
    7. Once we are happy with the result, we first Group these together (Layer Masks only work on Groups)
    8. Then we select Layer -> Layer Mask and then either a "Reveal All" or "Hide All" mask. The difference is the that first will apply the just selected adjustment to the whole picture and we can selectively blend it out (by brushing with a black brush) from areas that we don't want to. The other one is the revers, the adjustment is not applied and we can reveal it by painting with a white brush.
    9. Now, apply this adjustment just to the parts of the image that we wanted to apply it to. Make sure that you don't create harsh contrasts (e.g. when brightening the Milky Way, make sure that we don't create steep gradients in the sky around it).
    10. Repeat this for every adjustment we want to make (e.g. brighten up Foreground, darken sky, adjust color in some parts, bring out just the Milky Way core, bring out the reflection of the Milky Way in the lake...)
    11. Always make sure not to go overboard and create an unnatural looking image. We want to create an image that reveals details and has colors that we could see (our eyes quickly adjust to different levels of brightness or different lights)
  10. Once we made all the adjustments, as the final step we want to remove some noise from the foreground. Because we stretched the foreground, it's probably pretty grainy).
  11. First, we create a layer that assembles all layers from below (Shift-Alt-Ctrl-e)
  12. Then we apply the noise reduction (e.g. Nik Dnoise or Topaz Denoise)
  13. Then we select the channel "Noise Reduction"
  14. And finally we create a new layer - the selected "Noise Reduction" channel is automatically applied as a mask to this layer.
That's it!!! Again, I really like Dave's very methodical approach:
  1. choose which adjustment we want to make
  2. select and appropriate channel that will reveal this element
  3. make the adjustment
  4. use a Layer Mask to now apply this adjustment only to the part of the image that we wanted to
  5. lather-rinse-repeat
Finally, we can sharpen the image for different formats (e.g. web, poster...) using TKActions for Web or resize10 from ON1 for printing posters.

Here is an example:

First, in Lightroom
1. Original Image

2. Increasing Exposure

3. Adjusting Whites

4. Adjusting Blacks

5. Increase Vibrance

6. Remove Chromatic Aberration

7. Increase Blue Hue

8. Increase Blue Saturation

saved this image for background
9. Increase Exposure

saved this image for foreground

Now, I loaded them in Photoshop:

10. Combine them (foreground and background)

11. Milky Way Brighter

12. Sky Darker

13. Trees Brighter

14. Pop Stars

15. Increase Contrast (curves)

16. Decrease Noise in Foreground


Overall:
BeforeAfter
Continue on 3rd night: Crater Lake

2nd Night: Mt. Bachelor

We drove further south to Todd Lake. On my way there, I stopped at the Koosah and Sahalie waterfalls. So beautiful:

Koosah FallsRapids below Koosah Falls

Sahalie Falls
At Todd Lake, we setup on the west end of the lake overlooking Mt. Bachelor.
Beautiful Sunset over Mt. Bachelor
Milky Way over Mt. Bachelor - reflected in Todd Lake. If you look closely you can
see the Laguna Nebula in the reflection too!
I also took a Milky Way panorama - the weird lights in the front are people from our group with red lights.

Continue on 3rd night: Crater Lake (or if you are interested: Processing Milky Way Shots)

Monday, August 29, 2016

1st Night - Mt. Hood

Because of bad weather, we could not shoot in Washington but drove straight to Lost Lake near Mt. Hood.

Here we received a great lecture from Dave on his technique to take sunset and night sky images. I loved his very methodical approach. Not a crazy collection of "try this" and "your camera can do X", but a step-by-step approach.

Sunset / Sunrise / Landscape photos:
  1. Better to use a tripod (though I took a couple of photos without it if I saw a great opportunity and didn't have the time to move tripod)
  2. Set camera to Aperture Automatic
  3. Set aperture to f/8 - f/11
  4. Set ISO to 100 (unless it gets really dark - but 100 was always enough for me for all the sunset/sunrise images!)
  5. Use Live View!!!
  6. Use level in Live View to level the camera.
  7. Set White Balance to value that makes picture in live view look like real image
  8. Set EV correction, so that histogram doesn't get clipped on either side. Don't worry if image looks too dark - can be corrected later in Lightroom.
  9. Use one point focusing. Focus on a point that is twice as far away as the closest point in my image (rough estimation of hyperfocal position)
  10. And now focus on composition - not on settings anymore (check them frequently if light changes signifcantly)
Star / Milky Way photos:
  1. Of course, use a tripod!!!
  2. Set camera to Manual
  3. Use maximum aperture (i.e. minimum f value)
  4. Set camera to infinite focus (for the 14-24mm Nikkor lens, I have to set it just to the right of the midpoint of the infinite sign)
  5. Use rule of 500 to determine maximum exposure
  6. Use high ISO: 2500 - after experimenting with my D750 and the 14-24mm Nikkor lens, I determined that I can go to ISO 4000 without getting too much noise
  7. Shoot - and always check image in camera. Try to make the histograms just separate from left side. Although if there is a lot of dark foreground (e.g. trees) that could create a spike on the left side. But we don't want any of the sky area to have zero signal pixels.
  8. And now focus again on composition!!!

It was a great first night where all of us were amazed how well we can do this with so little experience:

Sunset over Mount Hood


Milky Way over Lost Lake
Sunrise over Mt. Hood

Continue on 2nd night: Mt. Bachelor

Saturday, August 27, 2016

Night Skies of the Pacific Northwest Tour

I joined the Night Skies of the Pacific Northwest tour with Dave Morrow. And to make it worth the drive up there, I took my telescope with me to stay 3 nights at Likely Place in Northern California on my way back (yei to power onsite and not having to carry around batteries and solar panels!!!)

First, I had to drive up there. On Friday, I went to Redding and the next day to Olympia in Washington. I'm always amazed about the diversity of the land and how empty it is once you leave the urban areas.

Leaving the bay area (bay bridge)


Northern California somewhere between the bay area and Redding.


Southern Oregon
Portland
Crossing the Columbia river from Oregon to Washington
Sunset near Olympia, Washington


Continue on 1st night: Mt. Hood