Saturday, December 22, 2012

Lots of new equipment

I am having (sort of) fun with setting up my new imaging equipment:
Well, first of all, not all components are here. I have only the 2 cameras and the Robofocus. The OAG and telecompressor will come next week - unfortunately, the filter wheel will come in 3(!!) weeks.

So, it will take a while until I can take images, but I can do the setup.

1. H694 and Lodestar
These were easy to install. The programs from Starlight Xpress worked out-off-the-box.

2. Robofocus
A little bit trickier. Took me half a day to figure out how to setup (removing the focus knob, gluing the motor on the spacer, installing the spacer, wiring). But finally, it's all done:

It's not optimal, that the focuser sticks out so much. But if I rotate it upwards, it interferes with the guiding scope and makes it hard to look through it. Maybe I switch the star finder and the guiding scope (again) to make space for it. But for now, it's OK.
I also have to use a serial-USB adapter to connect it to the USB hub on the scope. Right now, the adapter chooses a new serial port every time I reconnect it - which means that I constantly have to reconfigure the focusing program. I'll try to assign it in Windows' device manager, maybe that sticks.
But I can use the focuser either through the program from Robofocus or with the two buttons on the focuser controller.

3. TheSkyX
OK, I won't event talk about cost here. It seems to be an awesome program, but it better be for the $$$ that I spent...

First, I connected the Robofocus. There isn't native support, but I could connect it through the generic Ascom driver. The whole serial port assignment is really a pain in the ###. I can control the focuser from TheSkyX. But so far, I haven't found a good way to see the continuous camera image plus the focuser control at the same time (which I'd need for obtaining rough focus before letting TheSkyX take over to achieve exact focus).

Second, the H694 camera. I read somewhere that I can connect it to TheSkyX by copying the SX dll into the CCDSoft camera plugin directory. But that didn't work. Others recommended to connect it through the Ascom driver. That worked out of the box. Selected Ascom, selected "Starlight Xpress Main Camera", connected. And everything was OK. Could take pictures, see them, could even take continuous pictures.

Then, the Lodestar. That turned out to be much harder. I tried the Ascom driver. But the problem was that I only had the "Starlight Xpress Main Camera" entry in the camera chooser. Started, restarted, reconfigured, nothing worked. Asked in some forums. I finally re-installed the Starlight Xpress Ascom driver. I am "almost" sure that I chose the same settings. But afterwards, I had a second entry in the camera chooser list: "Starlight Xpress Lodestar". Choosing that worked.

Next night with clear skies I can now try out autoguiding and automatic focusing (of course, all these nights where I ficured out the whole setup it was clear, but where I'm ready it's raining :-(

4. CCDInspector
I haven't figured out yet how to connect CCDInspector to TheSkyX. There are entries for Maxim DL and CCDSoft - but not for TheSkyX. There is a "Generic" setting - the only parameter you can give it is a directory name. I think this will just monitor this directory for new images and use them in the analysis. So far, I wasn't successful in autosaving all the images in TheSkyX. Well, that's what I'll try this weekend...

... and I finally figured it out: this only works from the focusing tab. Have to select "Take Photo Continuously", "Autosave focus photos" and "Automatically save photos". And then point both TheSkyX and CCDInspector to the same directory. Now I can see the images from TheSkyX in the image viewer of CCDInspector (and it even cleans up afterwards!)

So, next clear night, I can try out
  • Manual (rough) focusing through TheSkyX
  • Two-Star Alignment with the H694 through TheSkyX
  • Autotofocusing with @Focus2
  • Autoguiding with TheSkyX
  • Collimation with CCDInspector
Can't wait!!!


Tuesday, December 11, 2012

This morning in our backyard

Mercury (above the bushes), Moon and Venus (above the Moon) - somehow Saturn escaped behind the tree into the upper right corner :-(


Sunday, December 2, 2012

Alignment through the camera

Tonight, I wanted to try out the Astrophysics CCD compressor. I aligned the scope. But when I then started PHD, it could not guide the scope well. Just after a few seconds, the guide start went far out.
So, I decided to align from scratch. But I did not want to take the camera off and such, so I did the whole alignment with the Live View from the Nikon camera. THAT TURNED OUT TO MAKE THIS WHOLE PROCESS INSANELY EASY!!!

  • I can use the whole sensor for a wide field of view and then zoom in to get the star in the middle
  • No crazy gymnastics to look through the eyepiece
  • Much easier to use the remote control while looking on the computer screen
What would be superhelpful is to have a reticle on the life view.

Alignment was superaccurate, so I'll try to do this all the time now.

Sunday, November 25, 2012

Wide field of Orion

Last night, I tried my first wide field image using the Vixen Polarie:

For a first try, I'm quite happy. And if it weren't for the freaking moon it would have been even better...

Thursday, November 22, 2012

Scope Setup

I followed the advice from John Smith at the AIC and tried to collect all cables on the scope and just run 2 cables out from the scope: USB and power. So far, I got it down to 3 (2 power and 1 USB). It certainly makes the whole setup MUCH easier and less error prone. And because I need a counterweight in the front of my scope anyway, it actually helps with the stability.


The only problem is that the Digi hub pulls a lot of power and depletes my Celestron Power tank quickly (doesn't seem to last one night of imaging anymore :-( Might need a larger battery when I want to go out ...

Wednesday, November 7, 2012

NGC 884 / NGC 869

Alignment was a breeze - the 2nd calibration star was almost exactly in the middle. Polar alignment went well. And then I wanted to take photos of NGC 884 / NGC 869. But somehow I lost the alignment. It was absolutely impossible to take 4 min exposures - they all had star trails. In fact, PHD couldn't correct it enough.
Instead of redoing the alignment, I tried shorter exposures (2.5 min). The result is OK - but I should have rather redone the alignment:
I will try these two clusters again. Also, I didn't do a good job in getting the colors out. There are several stars in these clusters who are yellow/red.

Thursday, October 25, 2012

A lot of replacements

So, today and yesterday I took care of all my equipment that doesn't work that well:

  • The 2x Powermate: the threading seems to be messed up. I can't thread in my filter. Today, I went to Orion and we tried it with other 2" filters - same result :-( Contacted High-Point Scientific - they are sending a replacement.
  • The heated dew shield - I blew several fuses. There seems to be a short circuit. High-Point Scientific will also sending a replacement for that.
  • The Celestron PowerTank doesn't recharge completely anymore. Contacted Celestron - they are sending a replacement. And I don't even have to send the existing one back.
So, at least I am getting great customer service. The good news is that I can still observe and take photos!

Forecast for tonight: clear skies! After dinner with my team, I'll try to go outside.

Today, I heard about MaxPoint. Automated alignment - including polar alignment! That sounds almost to good to be true.

And tomorrow AIC 2012 starts! Can't wait - especially the workshops on Friday!

Wednesday, October 24, 2012

Trying out the 2x Powermate

Today, I received the additional counterweight and also the 2x Powermate. I tried both - yes, it was finally clear!!

With the counterweight, I can finally balance the scope with all the gear (guidescope, starfinder, camera) in the back. Good!

Then I setup the scope, aligned and too photos of M27 with the Powermate. Turns out, that the 2x magnification together with the light pollution filter requires quite long exposure times. Here is the photo with 4 min exposures:

Not very sharp and not much light. I should try it again with longer exposures - but for that I'll have to polar align my scope better.

Sunday, October 14, 2012

First pictures with new scope

Last night it finally cleared up and I could try out the new scope. First, an easy target: M27

Cropped:

Compare this to the pictures that I took in September - these are indeed better.

I then tried two other targets:

NGC891:

IC137:

The problem with the latter 2 was that in both cases my laptop decided to go to sleep mode after 30 mins or so. That's why both objects are not too bright and why there is lots of noise in the picture.

I used the electric focuser from JMI for the first time. It's amazing how easy focusing is. The only problem is that the focuser motor uses a lot of space and I can't rotate my camera anymore. Next, I need to try out how to focus automatically. I also used the Aurora flatfield panels for the first time - what a breeze to take flats!!! And also dark flats: I just turn the panels off, but leave them on top of the scope. Nice!!!

Also, I ordered a Tele Vue Powermate 2x to shoot photos from smaller objects and also counterweights, so that I don't have to move my scope all the way to the back of the dovetail (and it's still not in balance).

Wednesday, October 10, 2012

New scope

My new scope finally arrived: A CGEM 800 HD from Celestron!

Left work early to set it up. Could easily mount the star finder and my guidescope.

... and then it started raining!!! Really? This is California, we supposed to have clear skies almost always!

Sunday, October 7, 2012

SJAA's Imaging SIG

Saturday, I went to an evening event with San Jose Astronomical Association's Imaging Special Interest Group (SIG) - theme "CCD Imaging for beginners".

It was great to see some folks setting up their scopes and how they are doing it. A couple of learnings:
  • most folks apparently balance their scopes heavier on one side for imaging
  • drift alignment isn't as hard as I thought (once you see it in person)
  • my whole setup (mount, scope, accessories) is pretty much what others have, i.e. I should be able to get lots out of it before I will feel the need to update
Afterwards, I looked more into what the SJAA does and found out that we will have the Advanced Imaging Conference in a few weeks in Santa Clara. With lots of interesting workshops on focusing, processing... Signed up for that one as well.

... and on Tuesday my new scope will finally arrive. Can't wait!!!

Monday, September 24, 2012

Broken mount :-(

After I got more and more "No Response 16" and "No Response 17" errors, my mount finally broke completely. In dec, it slews immediately at full speed (i.e. no gradual acceleration or slow down). And as a result, it completely over slews. It's impossible to align. Send a note to Celestron support, but didn't hear anything yet (will call them tomorrow).

So, I do all kinds of other stuff. Today, I played with the flatfield panel for taking flats. That will be SO much easier to take flats (even when I change my mind in the middle of the night and change the setup). And I don't have to play with exposure times anymore, but they are fixed now:

 ISO 400  1600  5000 
2x Barlow  1/3 1/13  1/50 
T-adapter   1/20  1/80  1/250
T-adapter + Focal Reducer  1/30 1/125   1/400
T-adapter + LPR Filter  1/13 1/50  1/160 
T-adapter + Focal Reducer + LPR Filter  1/20  1/80  1/250

Saturday, September 8, 2012

And now everything together

So, I finally put everything together:
  • balanced my scope
  • used the skyglow filter
  • used PHD (I can now do 4 min exposure times and have less then 10% failures!)
  • alignment, calibration and polar alignment with the reticle lens (though I still haven't tried/done the drift polar alignment)
  • finally cleaned out scope and camera
And the result is pretty good:

I also tried longer exposures with M57, they are better then the ones I had before, but not as good:

What's not so good:
  • the dew shield does not warm up anymore
  • I am still getting a number of "No Response 16/17" error messages. Checked the Celestron website and found some tips what to try. I'll do that when I come back from my trip.
To take photos without the scope, I bought an ultra-wide angle zoom. I'll take that with me on my trip (and also my tripod). I hope to take some wide angle shops when I'm in Zuerich (I hope that I can go on top of my hotel at night!)

And I was fed up with the process of taking flats at dusk or dawn and ordered an EL panel that will allow me to take flats anytime I want.

Tuesday, September 4, 2012

Got PHD autoguiding to work!!!

After many, many attempts, I finally got autoguiding to work. There were too many mistakes to mention here (chose a hot spot as a guiding start, calibration step size too small...) But finally it worked.

I tried it then by having a star (Altair) smack in the middle of the reticule - and it stayed there! Tomorrow I'll try to take pictures of M57 with eyepiece projection!

Not so good news: I had lots and lots of mount issues ("No Response 16") - will have to mail Celestron support about it.

M57

Tonight, I wanted to take pictures of M57 - this time without the focal reducer. Setup was quick! I then tried my luck (again) with PHD, but this time, during calibration, the scope did not move at all. I didn't bother to try to figure out what it was, but started taking pictures. I wanted to compare slower (30 sed) exposure time with longer (2 min),

Here is the result from 30 sec:

And here is the result from 2 min:

This is after super simple Background offset and DDP in Nebulosity. I'm sure that I could correct the background in the second picture. But there isn't more detail in the second picture!

For 30sec, I had to throw away 10 (20%) of all pictures. For 2 min, it was much higher: almost 50%!! Almost all "bad" pictures were "shaky" - I wonder where this still comes from. If the scope wouldn't be able to track properly, all pictures would be bad. But that some are bad and others aren't makes me believe that there is something else.

So, it seems as if this nebula is bright enough that it can be captured with just 30 seconds very well. Furthermore, it's sharper with the 30 second exposures. Maybe I should try it to do this with eyepiece projection (and maybe higher ISO to keep exposure times short).

Monday, September 3, 2012

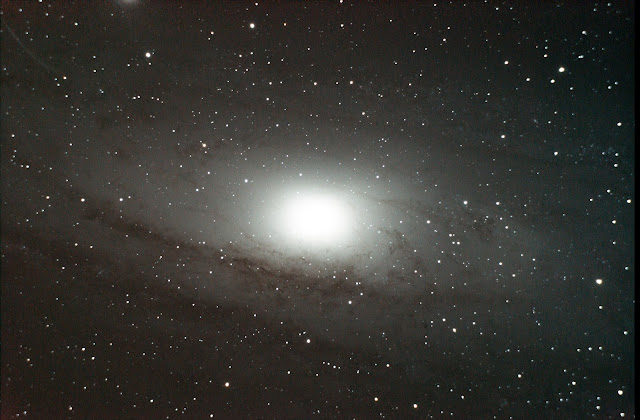
M31 with the skyglow filter

So, I put the starfinder under the guidescope bracket. It's pretty snug aligned to the guidescope, i.e. it won't wiggle too much. That will make alignment and calibration SO much easier. I should get some double-sided scotch tape to fix it further.

Now, I had to start the night with a whole lot of adjustment:
  1. Rough adjustment of the starfinder (not easy if the scope is not tracking yet)
  2. Alignment, calibration and polar alignment
  3. With tracking, adjustment of the starfinder and focusing and adjustment of the guidescope
  4. And now another round of alignment, calibration and polar alignment - this last run-through was a breeze!
Then I tried to get PHD working. I could easily get the starshooter camera to focus (haleluja for perfocal rings!) But when it calibrated, it could not calibrated the dec axis. And when I tried guiding, it went quickly out of center. I decided to rather take some photos instead of trying to get PHD to work.

First, I wanted to take photos of M57. But it came out very small in the photo - I should try that without the focal reducer. But I didn't want to take the whole camera off and such.

I tried to take longer exposures from M31: 4 minutes. The photos looked pretty good, but of course very saturated. So, I tried out the light pollution filter. The photos came out very blue, but not too saturated.
I set the scope to take pictures the entire night. When M31 was behind the gigantic redwood tree, I started to take darks - and then set the alarm to 1am to get up and setup the scope again for lights.

In the morning, it was clear, so I could take flats and dark flats. But it turned out that the scope stopped tracking again. When I read more about it, I found out that CG-5 scopes stop when an object crossed the meridian. Obviously, they can't track further. I was wondering if there is some option to automatically flip around, but that's not possible :-(

But at least I had 40+ pictures - each 4 minutes long.

I first stacked with DSS. Nebulosity could not deal with the blue hue. So, I tried to do some basic post-processing in Photoshop instead:

Not too bad. You can see some details of the spiral arm - but the bright center is overpowering. I need to figure out how to combine two images to get this better.

Sunday, September 2, 2012

M27

I tried M27 again. And...

... I think this is a really neat picture:

And even blown up, it still looks good:

I even did some basic post processing in Nebulosity myself...

A couple of observations tonight:
  1. Aligning / Calibrating is just WAY easier with the starfinder then a finderscope. I ended up taping(!!) the starfinder to the telescope to get it done. I need to find a way to get both onto the telescope.
  2. The stripes that I saw yesterday, I could also see today. I think the scope has some issues when it has to go through the zenith. When I made the telescope go to M27 again, it slewed all the way around.
  3. I could easily do 2 min exposure time!
  4. I wanted to use the starfinder for guiding, but suddenly the computer could not work with it anymore (although it worked during the day).

Saturday, September 1, 2012

Polar Alignment with the new mount

Took photos of M31 with the new mount. I still can't use exposure times >30 seconds :-(

The photos themselves were decent - pretty much the same quality I had before with the old mount.

And what's really annoying, I get quite a lot of "No response 17" error messages (at which point I have to swich the mount off and start all over again with alignment :-( I searched around and it seems to be a common problem with the Nexstar mounts. If it doesn't get better, then I might have to send the mount back.

I then tried to take photos of M27. It's much higher in the sky. Here I couldn't even take >10 seconds exposure. The mount slews exactly to the objects, so it should be well calibrated. Maybe I have to improve the polar alignment. And at some point, the scope stopped tracking completely. Couldn't use these photos at all.

Took the scope out during the day to work more on polar alignment during the day.
  1. Did a Sun alignment
  2. Polar alignment
  3. Turned scope off, did another sun alignment
  4. Another Polar alignment
    You would think that at this point, there is no correction necessary as I just did a polar alignment. But it was still a little bit out of alignment
  5. Again, turned scope off, did another sun alignment.
  6. Another polar alignment
    And though it was less then before, it still wasn't fully polar aligned.
Not sure if I'm doing something wrong. But all instructions that I found said that one star alignment and one polar alignment should be enough - not that this is such an iterative process.

I then put the tele-extender on the scope to try out eyepiece photography on the sun. The resulting photo was OK:

I'll leave the scope outside and will take more photos tonight (if it doesn't get cloudy again).

Tuesday, August 28, 2012

The new mount!

This new mount is very cool (and heavy :-)!

Yesterday, I got the CG-5 mount. Took me an entire evening to assemble it. And then I wanted to try it out. But I couldn't set it up ... and then it was too late.

Today, I first replaced the finderscope with the original starfinder. And then I figured the whole setup out: 2-star align, polar alignment (without Polaris!), 2-star align. That was it! And all objects smack in the middle of the eyepiece. Can't wait to try out taking photos tomorrow!

Saturday, August 25, 2012

Overcast :-(

I managed to setup the Orion Autoguider, adjust it and setup the Starshoot camera. Connected the camera to PlanCap and to PHD - both worked! Tonight, I'll play with PHD and see if I can set it up. It won't help me much with my current mount, but on Monday I'll get my equatorial mount!!!

I probably want to get an eyepiece with a reticle for better star allocation. Orion has a 12.5mm and a 20mm version. Will play with different eyepieces tonight to check if the 12.5 reduces the field too much.

And I started reading up what others did for their cable mess, I have now 6 cables on my telescope (autoguide, starshoot USB, dew heater, camera USB, camera LSUBS, camera power). It'd be nice to get them a little bit more ordered.

... and it is overcast tonight! It's never overcast here :-( Well, seems I have to wait until tomorrow night then ...

Friday, August 24, 2012

M31 without the focus reducer

Tried shooting M31 again, this time without a focal reducer and with ISO 6400. The result is ... ahem ... suboptimal:


Next I tried to take pictures with a light pollution filter, but that takes out A LOT of light. Even with ISO 6400 I could barely see anything. So, I tried again with ISO 1600 and without the filter. Unfortunately, all this messing around meant that I couldn't use my flats that I took earlier. And because the sky was cloudy the next morning (and I wanted to setup the new guidscope and the starshoot camera) I couldn't use any ...

Sunday, August 19, 2012

Andromeda and NGC 129

I collimated my scope again - it did not seem to be too difficult.

Oh, and I read somewhere that the 2 start alignment is better then the 3 star. Tried it and it worked pretty well on first try. Maybe just luck, or it's really better.

Because it was so quick, I thought about an object to take photos of: Andromeda! Setup, focusing... all went well. But then I could not take 30 seconds long pictures. All of them had stripes :-( I had to go down to 10 seconds. That sucks! Will take almost an hour to get 30 minutes of exposure time!!!

... so, I broke down and ordered the equatorial mount, the finder scope and the CCD camera. All will be shipped next week. That will be fun to setup and try out.

But I didn't take any flats and flat darks - which means I'll have to get up tomorrow morning at 5 and do that :-(

... of course, it was overcast in the morning :-)

Took flats later in the day and processed my images from Andromeda. Based on the initial pictures, I'm surprised what I got out:

I said this before, I really have to get better at the post processing...

NGC 129 did not turn out that well:

Thursday, August 16, 2012

Problems over problems

Today, I wanted to take photos. Took flats and flat darks and then went back outside when it was dark.

First, I had problems again with aligning my mount. Took me several attempts - I'm not sure if it's the GPS unit or something else.

When I had it finally aligned, I took a test shot of Altair and got this:


I thought that this was because I didn't collimate my scope correctly. So, I corrected it to get it to this:

But when I then checked closer, it was mis-aligned again. I asked at one of the forums and the answer was that this is most likely due to "some kind of lens flare". I wonder if it is the focal reducer. Will test this tomorrow.

... and now I have to collimate my scope again :-(


Wednesday, August 15, 2012

The cullimation eyepiece sucks

Today, I wanted to see if I can eliminate the strange rings that I sometimes get by collimating my scope. Of course, I used the Celestron collimation eyepiece that I recently bought. It seemed as if my scope was completely out of whack! Took me a while to collimate it. But when I was done, I realized that I could not focus at all anymore! And then I realized that the eyepiece does not sit snug, but can wiggle around. And that of course throws the whole collimation over board. And now I had to try to undo it...

But at least I could figure out what was wrong with DSRL Shutter: I have to set the camera to BULB and to "M up". And in DSLR Shutter I have to use the "AF during exosure (D200)" setting. Then it works!

When I then went back outside, I had (again) problems to calibrate my mount. I tried several times (always the 3 star alignment method). Sometimes, it could not resolve it. Sometimes it did, but then it was either completely in the wrong position when I tried to point it to a star. Or it would think that I'm in the southern hemisphere. This seems to have gotten worse with the GPS device. I should check where the scope thinks I am.

But worst of all: with all these problems, I couldn't take any pictures :-(

Monday, August 13, 2012

Photos from M2


I captured quite a lot of meteorites last night. I can probably get ~10 pictures with the tree and a meteorite. I also tried to make a movie - but somehow some frames were recognized differently (bigger/smaller) then others. Also, I have to find a way to color correct all these images in batch.

I also did some straight overhead shots to the Lyra (again). These also have the same orange hue, but interestingly enough after stacking them (including flats, flat darks and darks) the orange is almost gone! So, I guess I will be able to take some good pictures from our backyard.

In the evening, I went back to taking pictures with the focal reducer. Had a lot of problems with taking pictures without trails. I think have to do something about all the cables that are hanging from the telescope - most of these were due to me (or something) wacking the telescope.

And then I could not get DSLR Shutter to work properly. If I set the camera to a fixed exposure time, DSLR Shutter would not override it. If I set the camera to BULB, DSLR Shutter took a VERY short picture (1/30s or so). And if I set “Lock Mirror”, it took 2 photos! I’m pretty sure that this worked better before. Have to ask at a forum if there is some setting in the Nikon that I have to remember.

Some test photos of Altair that I took showed the weird “ring” again. I think I will have to cullimate the telescope.

My main object was then M2. The photos turned out much better then I expected. Even after my oversimple post-processing:


While taking the photos, I researched on better guiding. First, guiding scopes only work on equatorial mounts (makes sense). Second, some more basic cameras can function as guiding scope or also to take images of sun, moon and the planets. Thinking about getting these:


Read some more about PHD - that sounds like an awesome method to guide the scope while taking long exposures. But all-in-all $1,100. I think for now, I’ll stay with my current equipment and do some more shots like the one from M2. Maybe when we plan the next trip to an area with better visibility where I can take much longer exposures, I should get it.

What I should rather to is to focus on my post-processing skills. I’m sure that I could get much more out of my pictures. Maybe I ask if there are some folks in the bay area that would let me watch or would work with me on some of my pics.

One thing I might buy though is a wider lens for my camera for wide-angle shots, e.g.


Maybe next time we’ll visit Dr. Statti (or go to any other site where I will have better conditions) I’ll rent the first two to compare.


* Celestron has a guiding camera too (NexGuide), but unfortunately it doesn’t work with PHD or other guiding software.

Sunday, August 12, 2012

That eyepiece projection - yes, let's not do that for now

Tonight, I really want to try out some of my new equipment (Bahtinov mask, tele-extender...) I’ll have to figure out which object I will try - should be some larger, brighter nebula. Maybe I’ll try to take photos of sunspots with the tele-extender during the day to figure out the setup.

Read more about taking pictures:

  • Only need short pause - apparently, the heating noise of the camera is less bad then having more pictures taken. So, 10 secs - just to download the images.
  • Histogram should peak at 20 - 40%. That’s a great way to gauge exposure time.
  • The Nikon D7000 has an external power source (maybe I’ll go over to the camera shop this afternoon and try to get it)
  • people use pretty high ISO’s (up to 6400!), 1600 seems to be a good thing.
  • Need to check again how long my exposure time can be to not get rotation!

But I also want to try to take some photos of the Perseids. Maybe what I’ll do is to shoot first some pictures with the new equipment. And then leave the camera out there and just take lots of 30 sec pics with DSLR Shutter throughout the night (just with the 50mm lens). To make things easier, I’ll just put it on the tripod and point it somewhere where I’ll get one of the big trees into the picture too. Will try max. apperture, 6400 ISO, 30 secs - will have to try this first to make sure that the sky stays somewhat dark.

Couldn’t get the AC adapter for the Nikon at San Jose Camera - ordered it online.

Tried to take some pictures of the sun with the tele-extender. But to set the orientation just with one object (the sun itself) is very accurate and it gets out of focus quickly. But focusing the telescope with the tele-extender isn’t too difficult - that’s good! But then my Power Tank was discharged again. So, I’m recharging it and will take photos later.

… OK, eyepiece projection photography is probably out of my league for now. Took 50 pictures of M10. Even with ISO 6400, not much to see :-( I doubt that this was a problem of not having an equatorial mount. Next time, I’ll go back to the normal t-ring and the focal reducer.

I set then my camera to take photos through the 50mm lens for the entire night - some 1400+ shots (10 secs each). They are have a red/organge hue - I think from the street lights. But I should be able to get rid of that. In the morning I took the darks, flats and dark flats. Well, that will be fun

Friday, August 10, 2012

Still trying to get the hang of Photoshop

I don’t seem to get much improvement with Photoshop - compared to Nebulosity. Maybe I’ll send my picture to some of the mailing lists and ask for feedback.

But today, I received my Bahtinov mask. Can’t wait to try to take some photos again. I’ll definitively do that Sunday night. I should try to take much more photos to create a much longer shutter speed.

Wednesday, August 8, 2012

Photoshop is complicated!

Started working with Photoshop - boy, that’s one complicated product...

I wanted then to play with some of my photos and noticed how flat (aka monochrome) they were. I compared them to the originals - and yes, they have much more color! Tried to convert them to tiff’s and then run them through DSS. Suddenly DSS finds way more stars, but the resulting image is almost completely white.


Googled “Deep Sky Stacker Nikon Raw” and found several people who have problems with processing Nikon Raw’s with DSS. But nothing terribly helpful.

Sunday, August 5, 2012

More gadgets

Spent my weekend to process all pictures that I made as good as possible:

And I bought a lot of stuff:

  • New T-adapter and Nikon T-ring (yes, the old one is broken),
  • a tele-extender and another Nikon T-ring (for eyepiece projection photography),
  • a case for the telescope (really can’t wait to go to Dr. Statti next time!),
  • a Bahtinov mask,
  • a heated dew shield + DC adapter (it’ll also help with keeping all the other light out), and
  • a collimation eyepiece

None of these will improve my skills (or lack thereof) of post-processing my images. But they should improve the images that I take.

Reading more about post processing, there is just so much to learn and read - not 2 instructions or tutorials seem to have anything in common. But the more I read, the more Photoshop seems to be the tool that many people use and also many tutorials are out there (this seems to be an amazing collection of tutorial!) I’ll probably try it out. But will wait until I have a few more great pics.

Friday, August 3, 2012

More photos - M80

Want to try out more with the focal reducer. Took pictures of M80. I’m still amazed how much easier it is to take photos with DSLR Shutter - it’s just doing everything itself!

Noticed that the t-adapter for my Nikon seems to be loose :-( That might be the reason for the strange artifact from yesterday’s picture. Will check it out later.

Got a response for using a barlow with my camera. Apparently, I need a tele-extender and then use my normal lenses (plus barlow) with the camera. The magnification will go up A LOT (but also the brightness down, but for moon, sun and planets that’s apparently not a concern). Will order it.

Thursday, August 2, 2012

Using the GPS unit and the focal reducer - great improvements!

… left it running the entire day and it’s still not done. Weired. It finally finished in the evening, but the result was pretty bad (had some bad artifacts). I’m sure that something went wrong. But for now, I’ll probably stick with RegiStax - it also only requires one transformation, not two.

Today, I picked up the focal reducer and the GPS unit from work. Played with both.

The GPS unit makes the initial alignment process much easier - just one time confirmation. Done. Though my alignment wasn’t great. Have to try this out again, I hope that it was because I picked up wrong stars or such.

Tried also the focal reducer. Makes the Image half as zoomed.

Did a longer session with the Polaris start (took the lights with DSLR Shutter - MUCH easier). Took 50 pics.

And then I took another moon movie.

Pre-processed both. Results are OK, but I really have to start figuring out the post-processing process to get more details, color and sharpness.


Wednesday, August 1, 2012

First movie stacking experience

Spend a lot of time looking for better webcam solutions. Found the NexImage from Celestron and a whole range of others that are medium to expensive. But then I found someone who had the same problem that I had (can’t convert .mov files from the Nikon D7000 to process it with RegiStax). He found that Canon’s ImageBrowser works for Nikon .mov files too and converts a movie to a series of jpg images. Wanted to try it out, but to download it, I have to enter a serial number from a Canon camera. Will try that with my old Canon Rebel at home.

I also found the web site from Robert Reeves and his book Introduction to Webcam Astrophotography - unfortunately, it’s not available on Google Play :-(

Started to play with DSLR Shutter and my new DSUBS cable. Simple and sweet - I think this is great. At least for the beginning. Maybe at some point I need something more complicated. I should try this later this week

Earlier today, I found out how I could process my movies with RegiStax or AviStack:

  1. Create a .avi file with MPEG Streamclip - this can be handled by RegiStax
  2. From the .avi file, create individual images with the Canon ImageBrowser - this can be handled by AviStack

So, tonight, I shot a 2 min video from the full moon. Somehow, these images were not overexposed at all, but looked perfectly.

Registax:
Import and pre-processing was easy (after the conversion to the .avi file). Unfortunately, the tutorial that I found is for an earlier version and doesn’t apply anymore. This one is for RegiStax6  - will try it out tomorrow for a better result.


Avistack:
Pointed Avistack to the folder with all the individual images that ImageBrowser created and then pressed “Batch Processing”... boy, and then it takes a LOOOONG time. My computer went to sleep over it...

Tuesday, July 31, 2012

Comparing DSS and Nebulosity stacking

Looking more into focusing. Another cool gadget would be this motorized focuser - though I don’t really have a problem with too much shaking when I focus the telescope. But this is something I would like to have for my camera when I make photos through a lens.

But I’ll get to try out lots of new gadgets soon:

  • The focal reducer already arrived at work
  • The DSUBS cable should arrive tomorrow
  • The GPS unit for the Nexstar remote should arrive tomorrow

Can’t wait to try them out (especially DSLR Shutter with the DSUBS cable). Unfortunately, the focal reducer will probably reduce the range of the telescope even more with the camera attached.

I took flats and flat darks tonight - but it’s cloudy again. So, I won’t be able to shoot more pictures my last night here :-( Only back in San Jose with all the other lights and such, too bad!

In the absence of taking new pictures, I played more with the ones from a few nights ago.

First, I wanted to compare DSS stacking with Nebulosity stacking:


DSS stacked:


Nebulosity average stacked:


Nebulosity std dev (1.5) stacked:


Ignoring the diagonal lines of Nebulosity (I need to buy a license for it - I’ll probably end up using it anyway), the images are quite different. The Nebulosity pictures have some greenish hue towards the upper left corner - the DSS stack doesn’t. There shouldn’t be any hue at all (Lyra is next to the milky way). But somehow the Nebulosity pictures look much richer.

Zoomed into the main stars of Lyra:

1. DSS


2. Nebulosity (average stacked)


3. Nebulosity (std dev stacked)


The resulting colors are quite different. Vega itself is blue with DSS ad red’ish with Nebulosity - the DSS color seems to be much more realistic. On the other side, delta2 lyr is red with DSS and blue with Nebulosity - and in reality it’s red.

Somehow, Nebulosity seems to have mixed up the color palette (in the originals, the colors are correct) and introduced this strange hue.

But I still haven’t made much progress with post-processing of the pictures themselves...

Monday, July 30, 2012

Comparing various processing techniques

Well, I actually woke up late enough (1:30) but forgot about the fog... So, no combined shots for now :-(

Pre-processed all images. Here are the results after some basic post-processing (background color adjust, DDP Stretch - I tried Sharpening and Noise reduction too, but they don’t seem to have any impact):


Comparing different noise corrections:

1. None


2. With explicit darks


3. With camera noise reduction


Can’t see much of a difference, but you can clearly see the vignetting.

So, here are the 2 different noise reductions with and without flat correction:

1. Noise reduced with explicit darks:


2. Noise reduction from the camera


The vignetting effect is clearly visible - shows how important it is to take the flats (though next time I need to take them the correct way - with ISO 100 and proper shutter speed).

But there isn’t a visible difference between the two different noise reductions. I guess that doesn’t matter too much.

Now, I have to get better with color corrections (so far I just applied some default post-processing steps). And also I have to do a better job in focusing. The following is a zoom into this image:


I guess, that’s where I have to figure out how to do computer-supported focusing - don’t think I can do it better with the naked eye (the strange diagonal line is from Nebulosity - still don’t have a license).

After playing with all those tools, I’ll probably stick with DSS, Nebulosity and I hope that DSLR Shutter will work with my DSUBS cable. These are fairly simple and should work for me for some time. Nebulosity has a lot of manual pre-processing that I could use if DSS fails.

Just got the notification that the focal reducer was delivered (to work) and that the DSUBS cable will arrive on Thursday. Can’t wait to try it.

Also got a reply from the Avistack guys - seems as if it’s not that easy to load .mov files. But considering that I am not able to take a movie of the moon that’s not overlit, I won’t need this any time soon anyway.

Have to figure out what pictures I want to take tonight.

… actually not - it’s completely overcast.

So, I’m reading more on focusing. I am somewhat surprised that nobody came up with a mixed software/hardware solution that does this automatically. All solutions rely on doing the correction to achieve focus manually.
For the telescope, a Bahtinov mask sounds like a fast way (or these are way cheaper) - but need to measure the outside diameter of my telescope. Or Stilletto to get really fancy. Not sure what to do when I just want to take photos with a lens and not the telescope.